Create Sales POCs
You use the Create New POC wizard in the Sales Enablement menu to create a new POC and invite one or more prospects to use it.
Note
Before you begin, you'll need to prepare a Snapshot of the environment that will be used for the POC and shared with your sales prospects.
The wizard takes you through each of the following steps to create an invitation to a trackable POC.
Choose the Blueprint
-
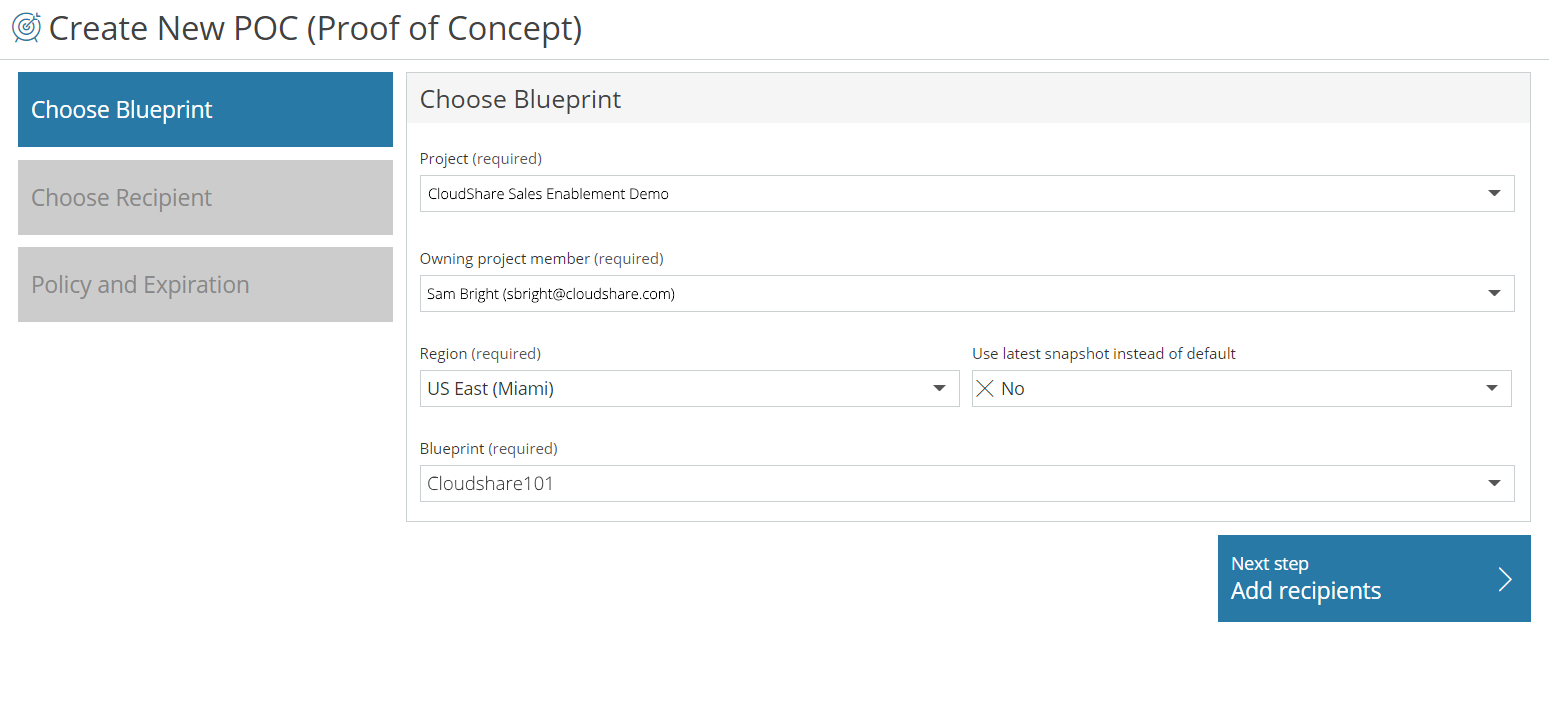
From the Sales Enablement menu, click Create POC A wizard opens showing the Choose Blueprint step:

From the Project dropdown menu, select the project that contains the POC Blueprint.
From the Owning project member dropdown menu, select the project member who is responsible for managing the prospect. This person is typically the point of contact for the POC. The logged in user appears by default.
If your project has access to more than one CloudShare region, you’ll see a Region dropdown menu. Select the Region where you want the POC to run.
If the Use Latest Snapshot Instead of Default dropdown is displayed, select Yes if you want to use the most recent snapshot instead of the default snapshot of your Blueprint.
From the Blueprint dropdown menu, select your Blueprint. Only those Blueprints which have snapshots saved to the selected Region will be displayed.
Click Next Step: Add Recipients to continue. The Choose Recipient step is displayed.
Choose the Recipients

-
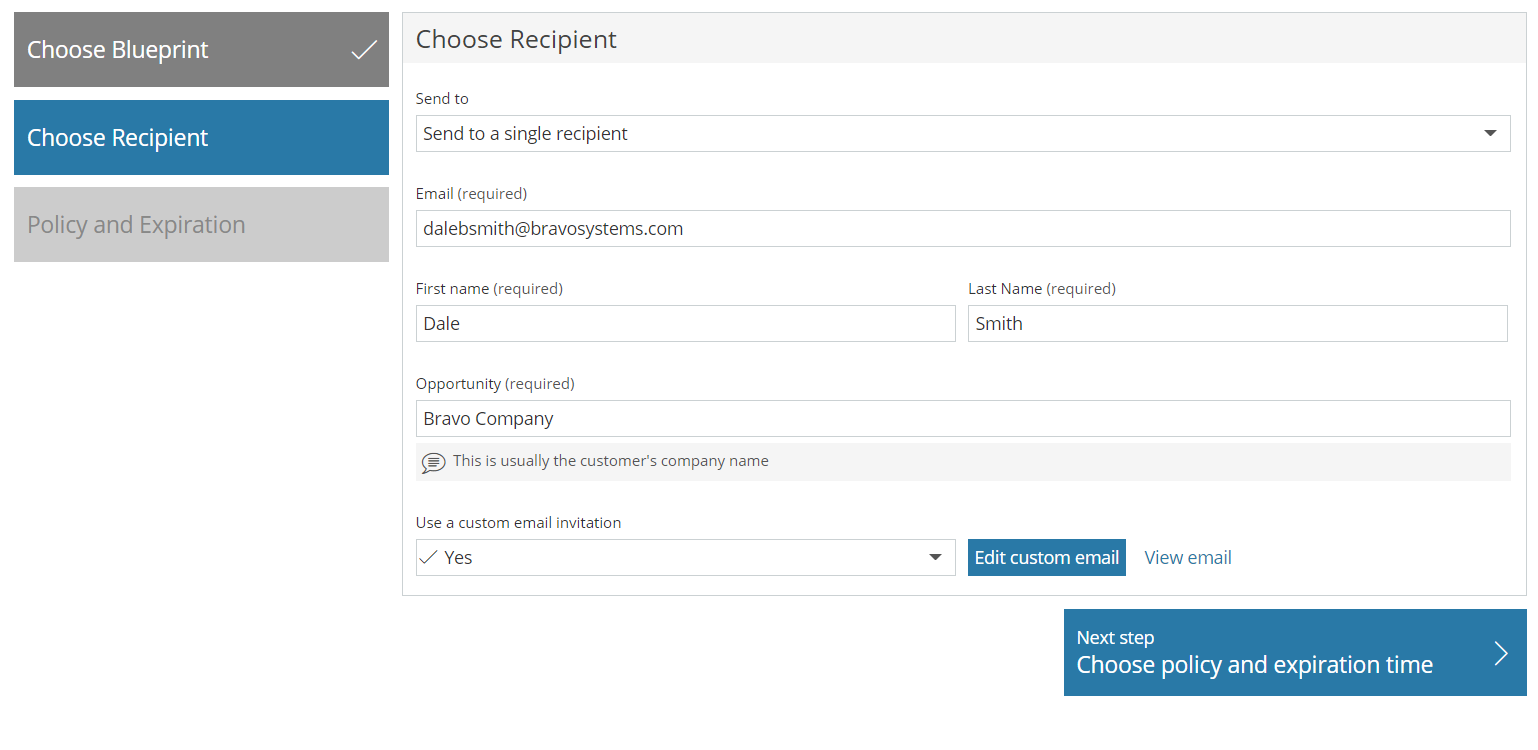
The Send To dropdown provides three options:
Send to a single recipient. (Default) In the First Name and Last Name fields, enter their first and last names. In the Email field, enter the email address of the person who will receive the POC.
-
Send to multiple recipients. The Multiple recipients CSV file dropdown appears. Click Choose file to open a selection window and navigate to the prepared CSV file containing the list of persons to receive the POC. For details on how to prepare this CSV file, click here.

-
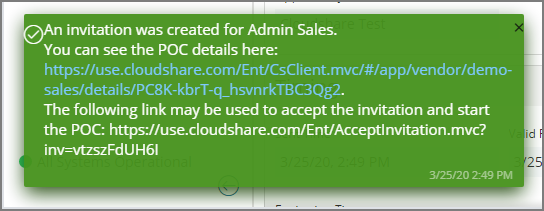
Do not send. This option only generates and displays the POC Accept URL link in a popup notification. You can embed this link in a separate email that you send out later.

In the Opportunity field, enter the name of the company or organization receiving the POC.
-
The Use a custom email invitation dropdown provides two options:
No. (Default) The default email invitation will be sent for this POC. For details on how a project manager can edit the default email invitation, click here.
Yes. The Edit custom email button will appear. Click it to open and make the desired changes and then click Apply to save them. For details on customizing the invitation email, click here.
Click View email to see the current default or custom email invitation at any time.
Click Choose Policy and Expiration Time to continue. The Choose Policy step is displayed.
Choose Policy and Expiration

-
From the Invitation valid for dropdown list, select the period of time that your POC invitation will be available. This is the duration of time during which the prospect can accept the invitation. Choose from a pre-defined time period, or use the Custom range to define a custom time period using the built-in date picker.
When you select the Custom range option, the Time zone dropdown will also appear. You can optionally select the time zone that will be used to enable access to the invitation.
From the Environment Policy dropdown list, select the the policy that will govern the life cycle of the POC environment. The policy determines how long the environment will be available for use, when it will be deleted, and what will happen to it during periods of inactivity.
Click Create Proof of Concept Invitation to complete and send your POC invitation. A confirmation message appears. The new POC will be saved and the listed in the POCs grid.
Preparing a CSV File for Multiple Recipients
-
Create a CSV formatted text file that contains the details of all email recipients you want to invite to the POC.
The CSV should not contain a header row. Each row of the CSV file should contain one recipient’s details in the following column order: Email Address, First Name and Last Name.
-
From the Multiple recipients CSV file dropdown, click Choose file and upload this CSV file to import your recipients list.
If there are formatting errors in your CSV file, an error message appears and the recipient list will not be imported. Correct any file formatting errors and then try uploading again.
Managing POC Permissions
CloudShare enables you to change activity permissions that are associated with a POC, based on a user's assigned Role. For complete details, click here.

Comments
0 comments
Article is closed for comments.